Creating Your First Email Campaign
This guide will walk you through creating and scheduling your first email campaign using LaunchMailbox's advanced AI-supported scheduling system.
Prerequisites
Before creating an email campaign, make sure you have:
- Registered a domain (Domain Registration Guide)
- Set up your mailboxes (Mailbox Setup Guide)
Accessing Campaign Creation
- Navigate to "One-Time Campaigns" in the left menu
- Click "New Campaign" button
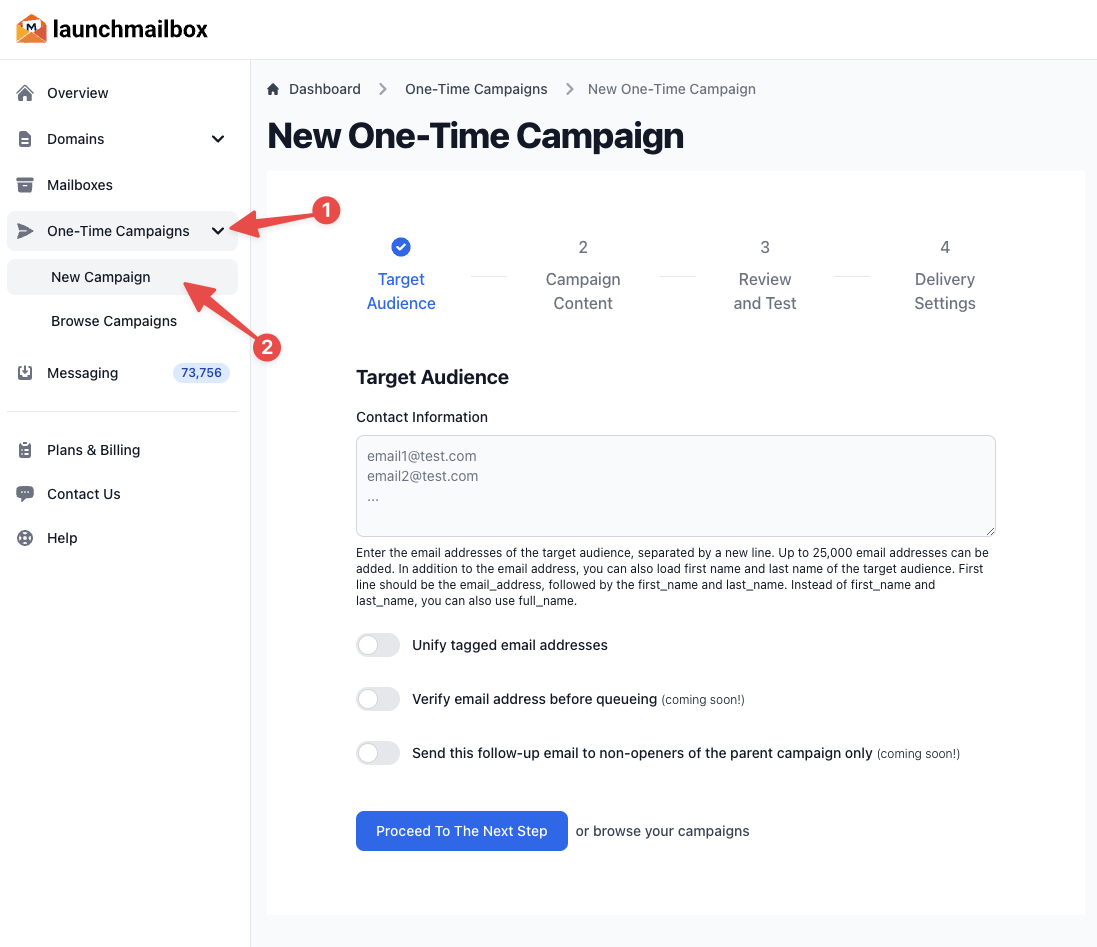
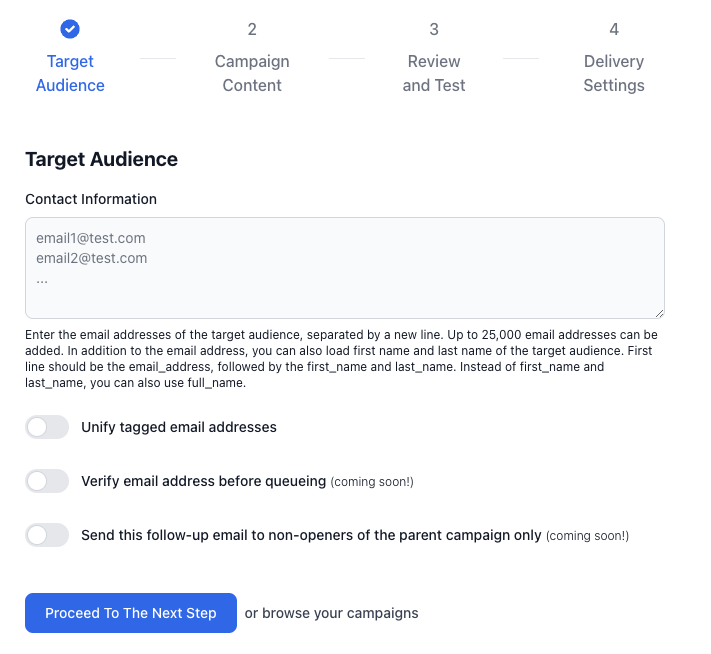
Step 1: Loading Your Target Audience
In this step, you'll import your contact list in CSV format.
Contact List Requirements
| Field | Required | Description |
|---|---|---|
| email_address | Yes | Contact's email address |
| first_name | No | Contact's first name |
| last_name | No | Contact's last name |
| full_name | No | Alternative to first_name and last_name |
Import Format Examples
Basic Format (Email Only)
email_address
[email protected]
[email protected]
[email protected]
Extended Format (With Name Fields)
email_address,first_name,last_name
[email protected],John1,Doe1
[email protected],John2,Doe2
Alternative Format (With Full Name)
email_address,full_name
[email protected],John1 Doe1
[email protected],John2 Doe2
Pro Tip: Enable "Unify tagged email addresses" to automatically consolidate variations of the same email address (e.g., [email protected] and [email protected] will be treated as one contact).
Important: To maintain high deliverability and protect your domain reputation, LaunchMailbox limits sending to 20 emails per mailbox per day. These emails are automatically distributed throughout your configured working hours.
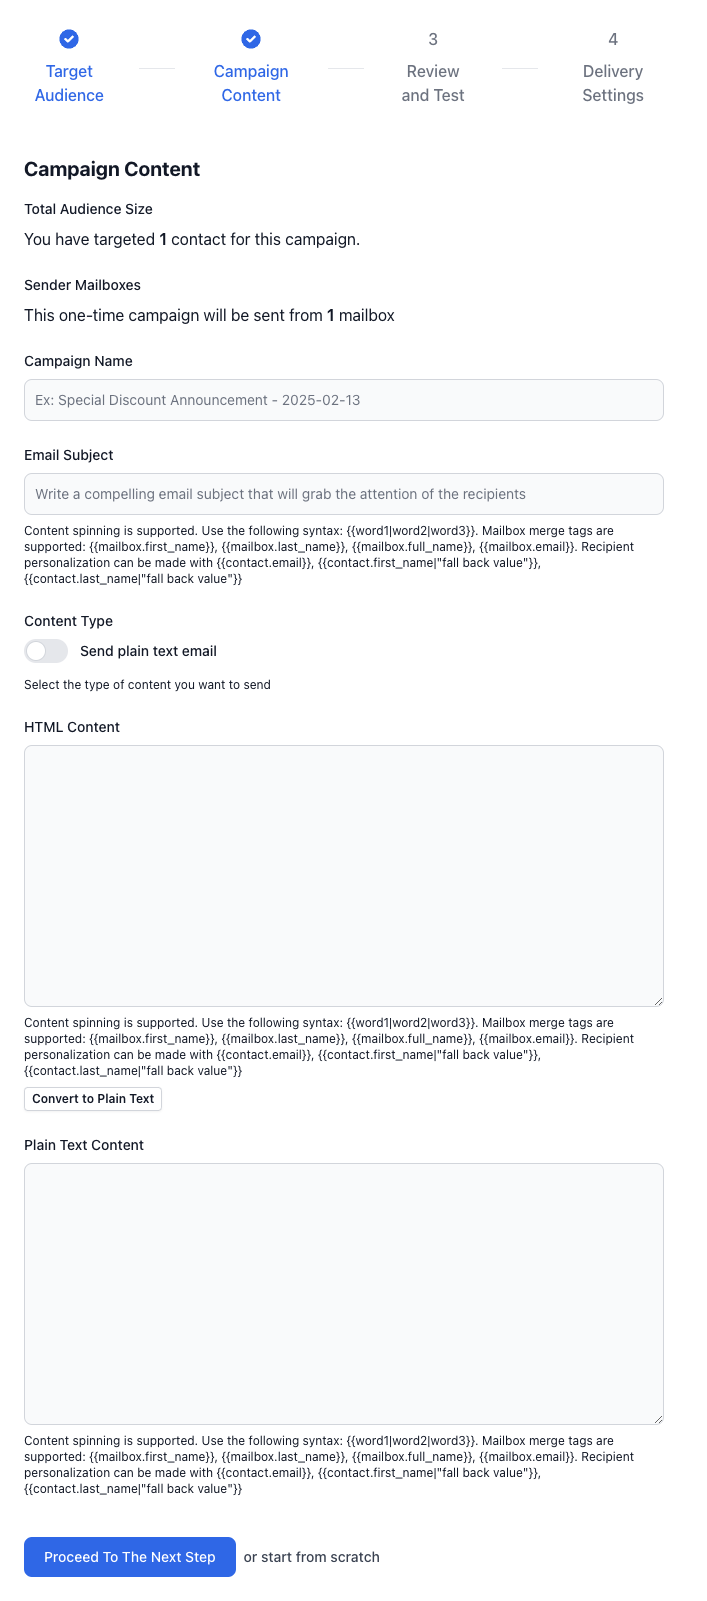
Step 2: Creating Email Content
Campaign Details
| Field | Description |
|---|---|
| Campaign Name | Internal reference name |
| Email Subject | Subject line recipients will see |
| Send Plain Text | Toggle for plain-text only emails |
| HTML Content | Rich text version of your email |
| Plain Text Content | Text-only version of your email |
Personalization Options
LaunchMailbox supports powerful personalization through merge tags:
-
Content Spinning
{{word1|word2|word3}} -
Mailbox Tags
- {{mailbox.first_name}}
- {{mailbox.last_name}}
- {{mailbox.full_name}}
- {{mailbox.email}}
-
Recipient Tags
- {{contact.email}}
- {{contact.first_name|"fall back value"}}
- {{contact.last_name|"fall back value"}}
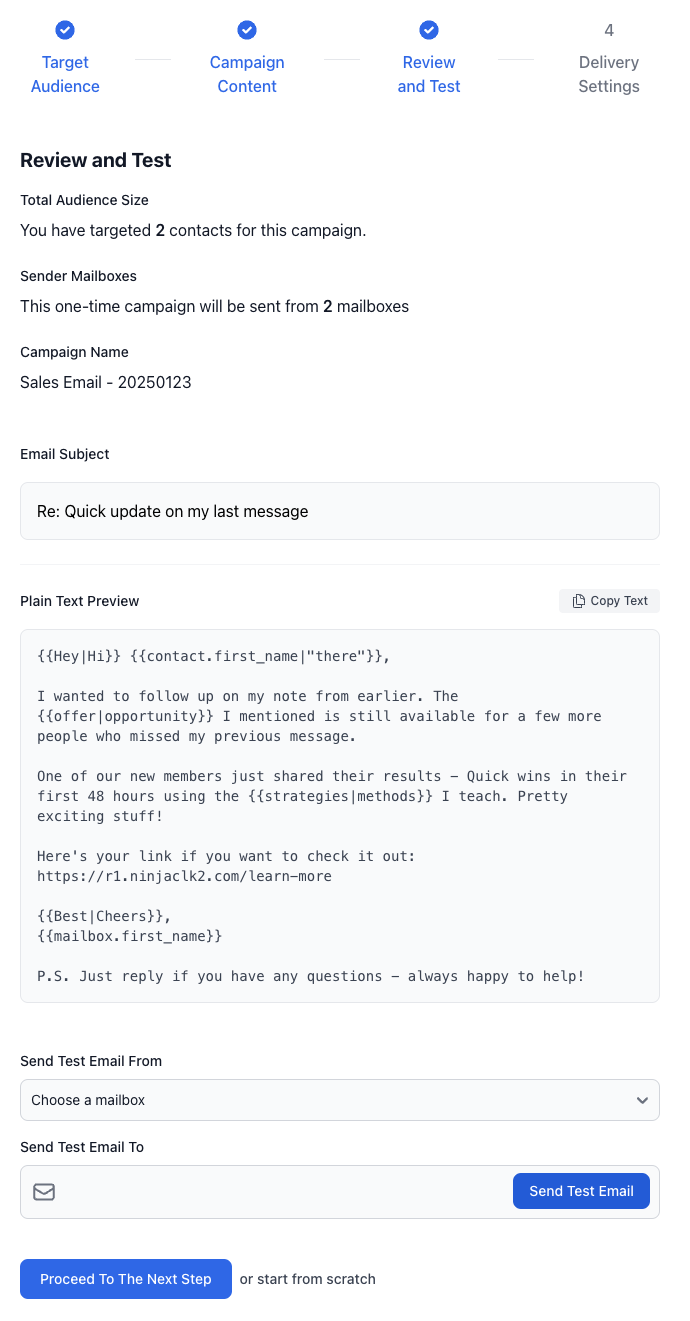
Step 3: Preview and Testing
Before scheduling, you can:
- Review your email's final appearance
- Send a test email to yourself
- Make any necessary adjustments
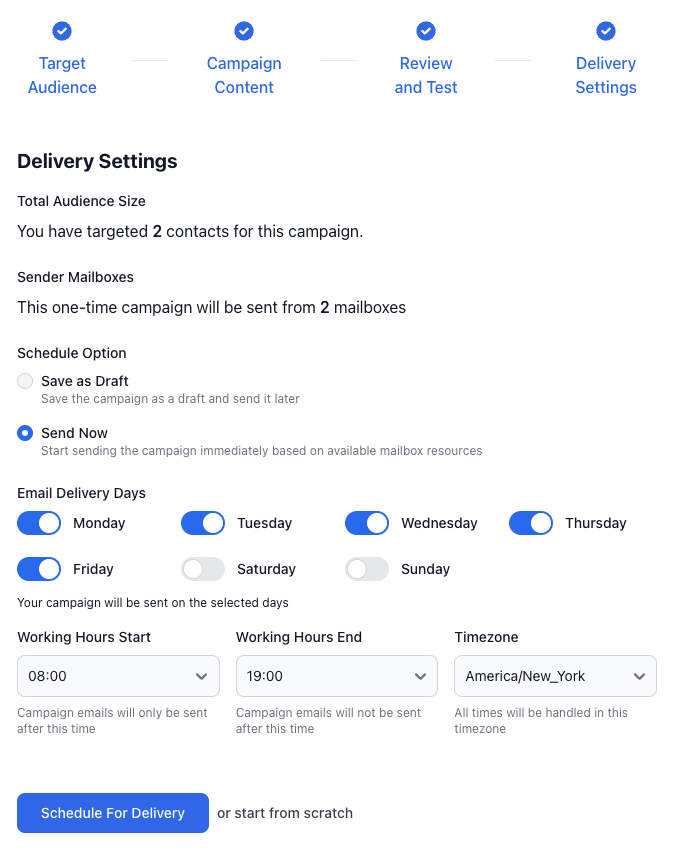
Step 4: Schedule Settings
Campaign Status Options
-
Draft
- Save campaign for later
- Edit anytime before scheduling
-
Send Now
- Configure delivery settings:
- Select delivery days (Mon-Sun)
- Set working hours
- Choose timezone
- Configure delivery settings:
Delivery Management
LaunchMailbox's AI-powered scheduling system automatically manages your email delivery with built-in safeguards:
- Maximum 20 emails per mailbox per day
- Emails are evenly distributed throughout your specified working hours
- Delivery is optimized based on recipient timezone settings
Best Practice: Align delivery times with your audience's timezone and working hours for optimal engagement. The 20 emails per day limit helps maintain your domain reputation and maximize inbox placement rates.
Managing Your Campaign
Campaign List View
- View all campaigns and their statuses
- Monitor key metrics
- Access campaign actions via three-dot menu (...)
- Copy campaign
- Send follow-up
- Delete campaign
Campaign Dashboard
Access detailed campaign information by clicking the campaign subject:
- Email preview
- Delivery schedule
- Mailbox utilization
- Schedule settings
- Reply tracking
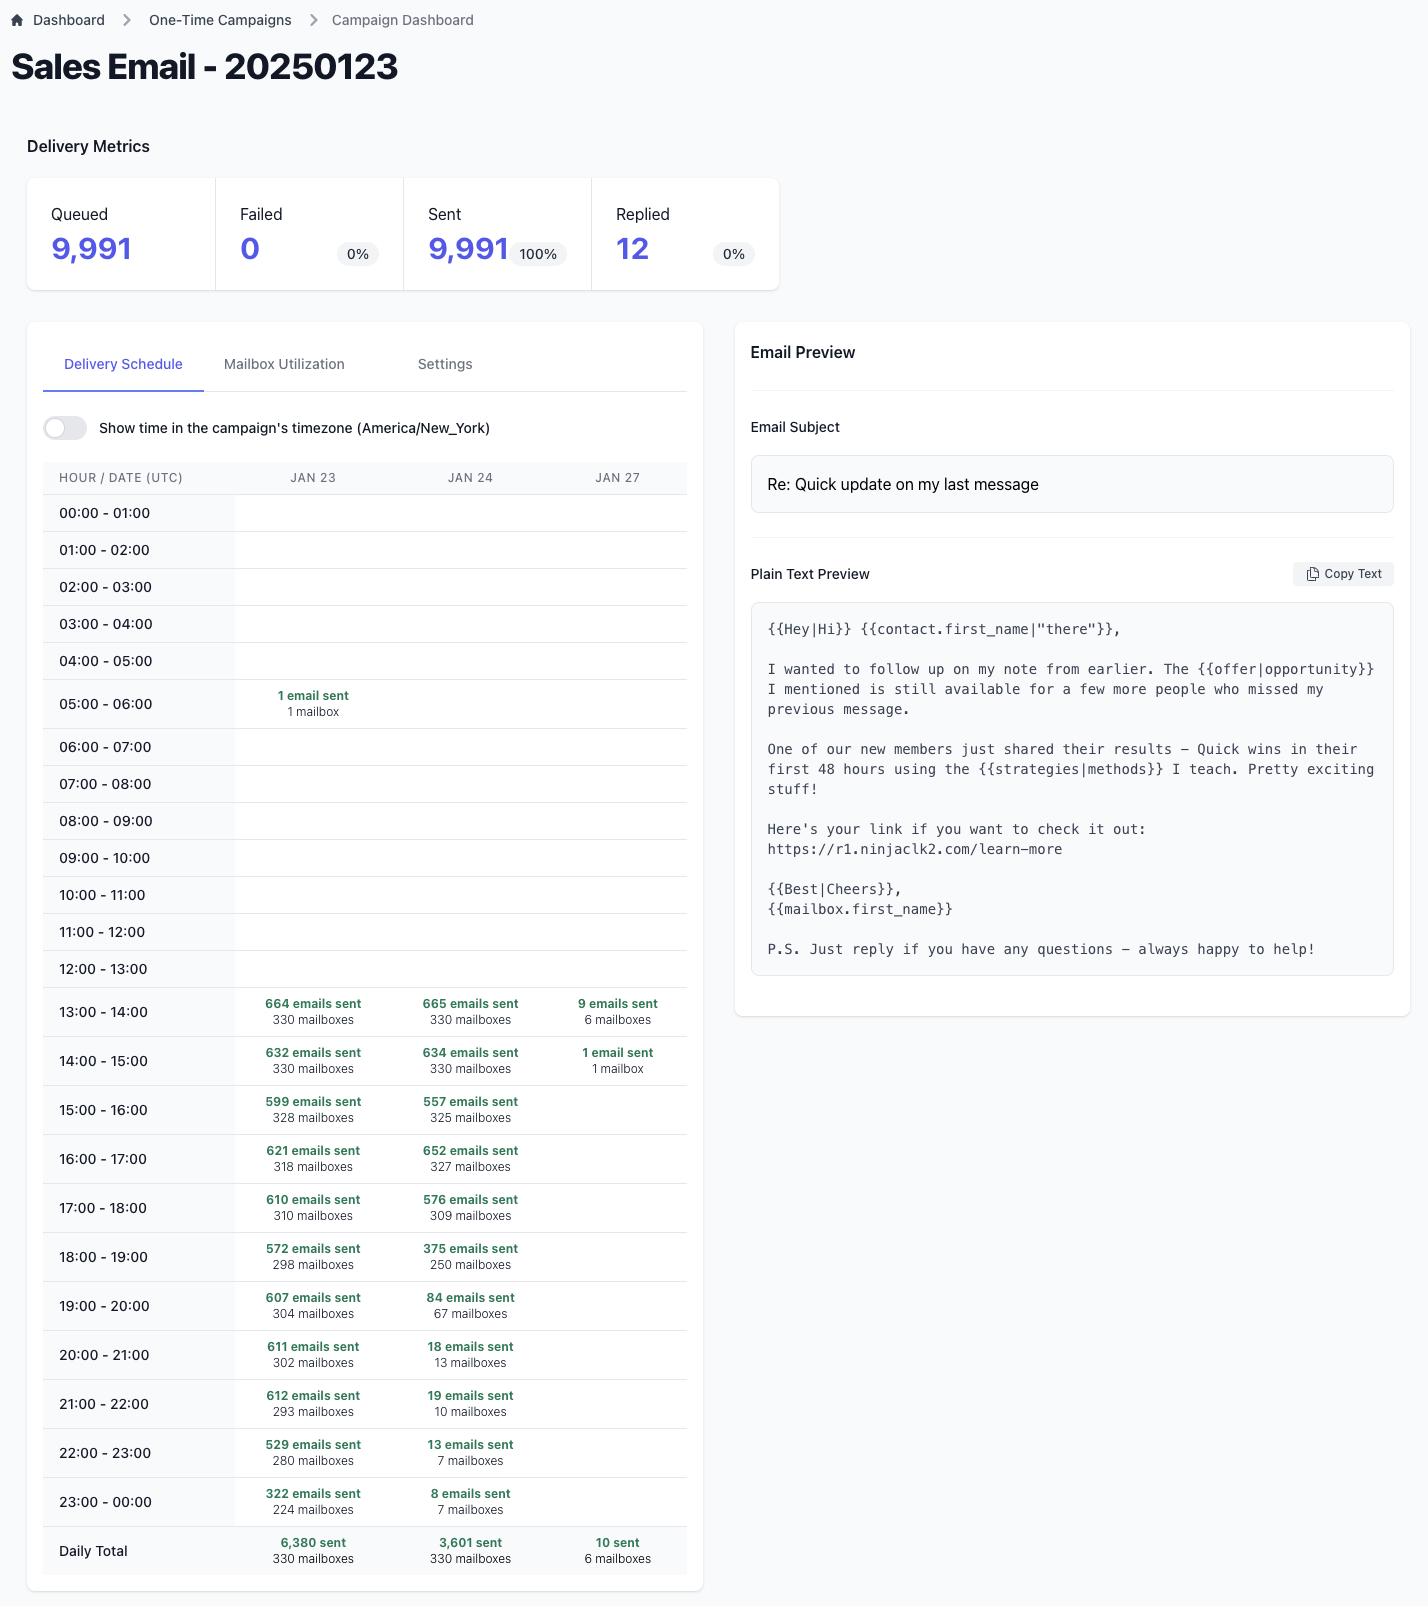
Reply Management
All replies to your campaign emails are:
- Automatically captured
- Available in the "Messages" section
- Tracked in the "Replied" metric
Note: LaunchMailbox's AI-supported scheduling system automatically optimizes delivery timing to maximize inbox placement rates.