Registering Email Sending Domains
This guide will walk you through the process of registering email sending domains for your LaunchMailbox account. Before proceeding, make sure you have successfully integrated your Namecheap account with LaunchMailbox. If you haven't done this yet, please follow our Namecheap Integration Guide first.
Prerequisites
- An active LaunchMailbox account
- Integrated Namecheap account
- Sufficient balance in your Namecheap account
Step-by-Step Registration Process
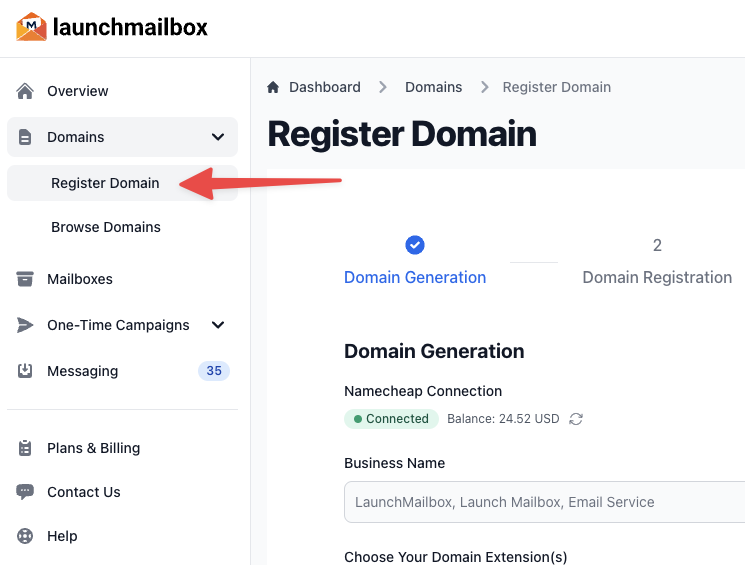
1. Access Domain Registration
- Navigate to the "Domains" section in the left menu
- Click on "Register Domain" under the Domains menu item
2. Verify Namecheap Integration
Before proceeding, the system will display your Namecheap account status and available balance.
⚠️ Important: Ensure your Namecheap integration status shows green and you have sufficient balance for domain registration.
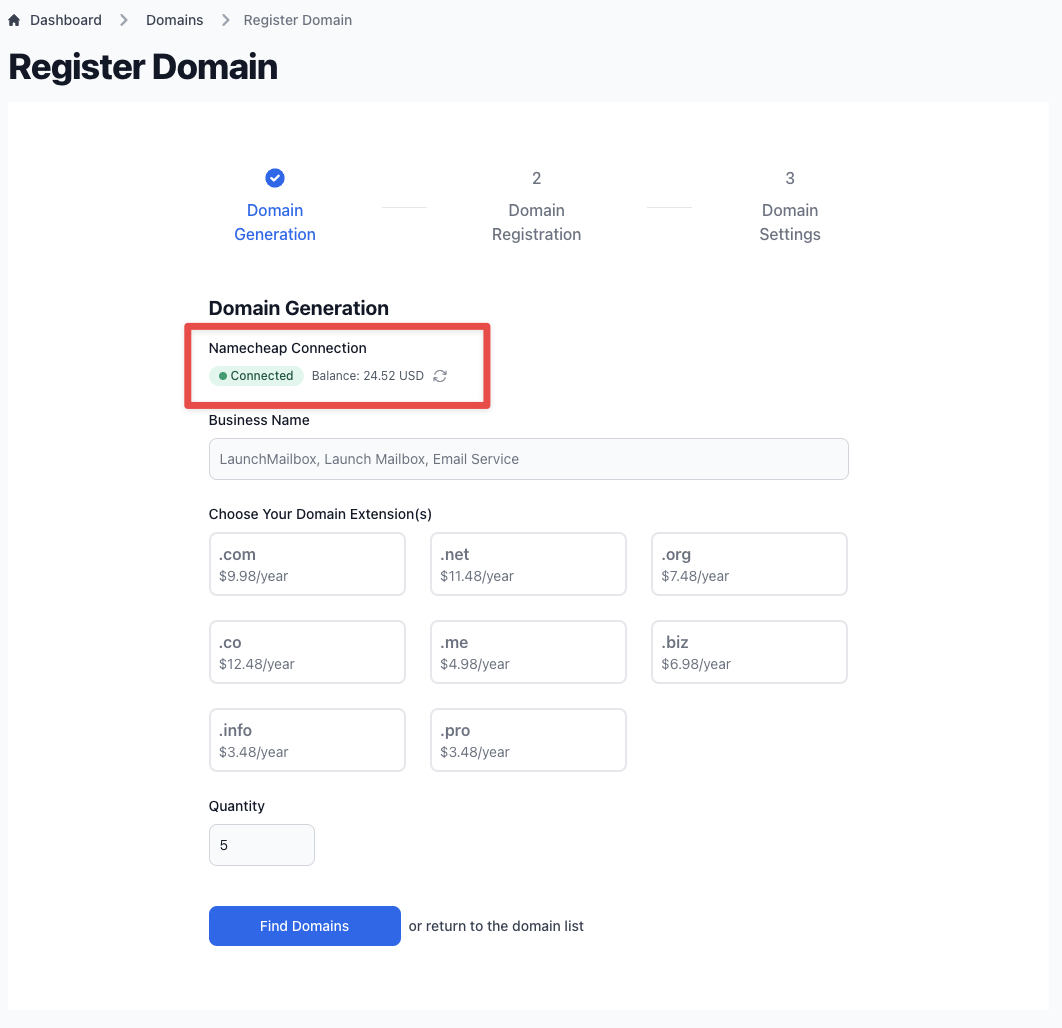
3. Configure Domain Search
Enter the following details to help LaunchMailbox AI generate relevant domain suggestions:
| Field | Description | Example |
|---|---|---|
| Business Name | Your company name | Acme Co. |
| Keywords | Terms related to your business (comma-separated) | sales, push, reach, rocket |
4. Select Domain Settings
-
Choose Domain Extensions
- Multiple extensions can be selected
- Each extension displays current Namecheap pricing
-
Specify Quantity
- Select the number of domains you want to register
💡 Tip: Selecting multiple extensions increases your chances of finding suitable available domains.
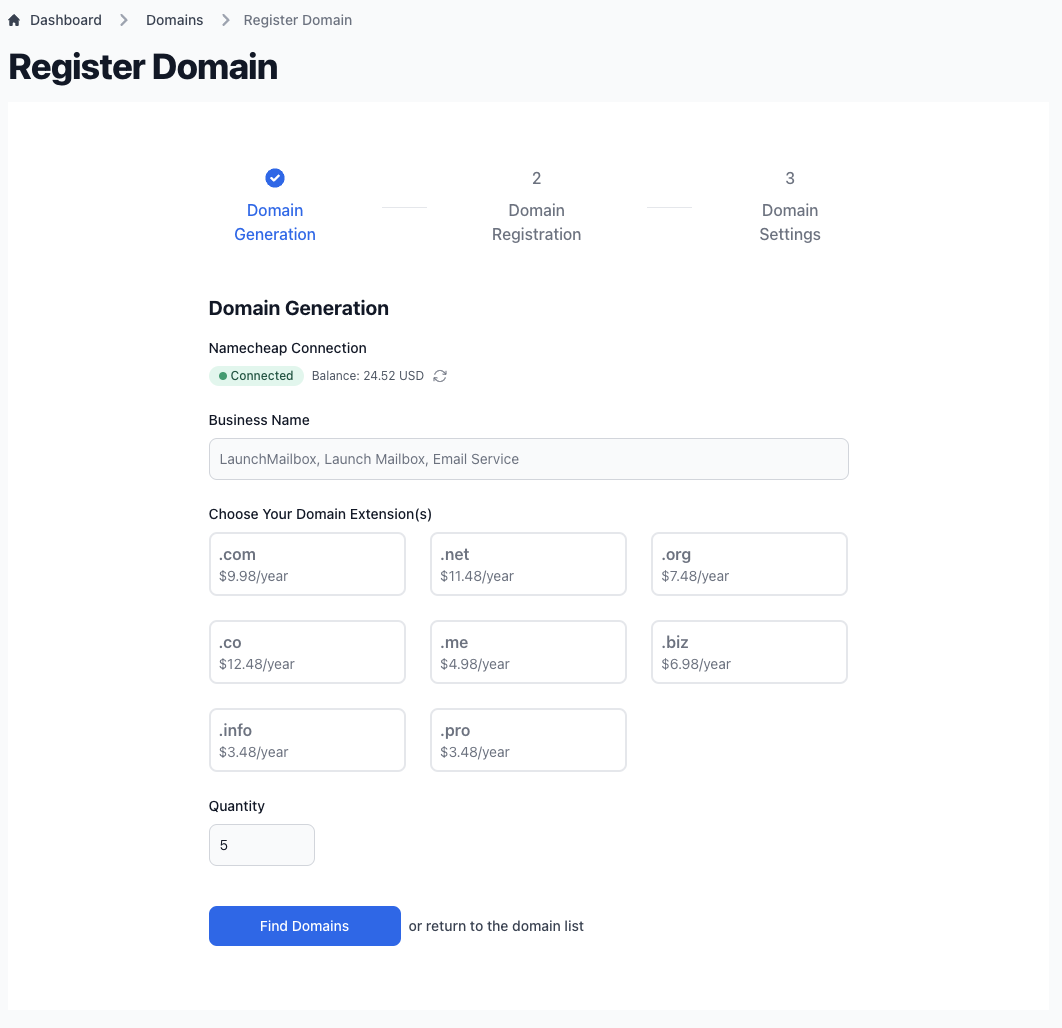
- Click "Find Domains" to initiate the search
- LaunchMailbox AI will generate domain suggestions
- This process typically takes about a minute
5. Review and Select Domains
Once LaunchMailbox AI completes the search:
- Review the list of suggested domains and their availability
- Select the domains you wish to register
- Click "Register Selected Domains"
6. Configure Domain Settings
In the final step, configure these important settings:
| Setting | Description |
|---|---|
| Auto Forwarding URL | The website where visitors will be redirected when they visit your sending domains |
| Enable Auto Renew | Toggle this option to automatically renew domains annually |
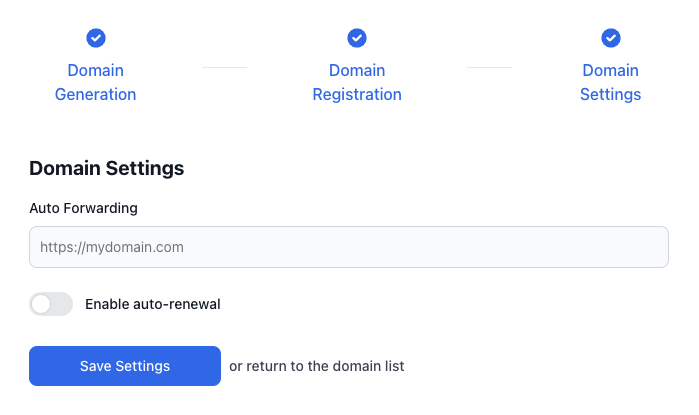
Click "Save Settings" to complete the registration process.
Managing Registered Domains
After registration, you'll be redirected to your domain list where you can:
- View all registered domains
- Monitor domain status
- Manage domain settings
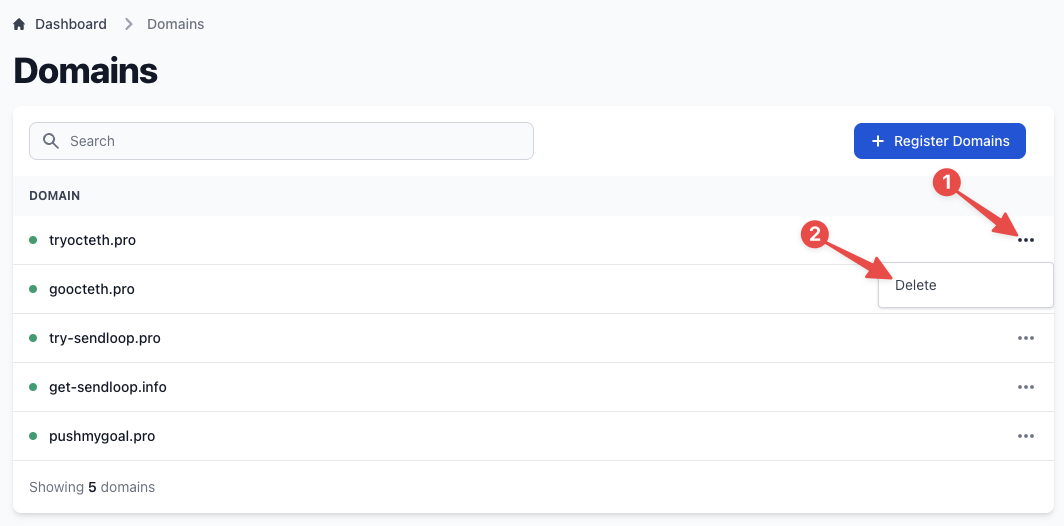
Disabling Domains
To disable a domain:
- Locate the domain in your domain list
- Click the three dots (...) menu next to the domain
- Select "Delete"
- Confirm the deletion
⚠️ Note: Deleting a domain will disable it in the system but won't affect your domain registration on Namecheap.
Need Help?
If you encounter any issues during the domain registration process, please contact our support team at [email protected].
Related Articles: